Before you start hollering... we did use a cheat last night because I just didn't think I could get the same effect butter gives you with coconut or olive oil. I used grass-fed, happy cow, organic butter. :P
I've never been a fish fan which isn't really fair to Gary that I've waited this long to try. He loves fish and other seafood. Ok, let me rephrase, I'm not a cooked fish fan. I love me some sushi!
He was pretty excited that I chose this recipe to prepare. He didn't have to ask me. I found and planned it without even telling him. I wanted to be a surprise.
Let's begin. First, I prepared enough for 3 meals. 2 servings for Gary (he brings one to work the next day) and 1 for me.
Tomato Relish
1 small red onion, sliced
2 medium tomatoes, diced
1/4 cup kalamata olives, sliced *
3 tablespoons capers *
2 tablespoons grass fed butter
Fresh ground pepper to taste
Salmon
3 filets , skin on
2 tablespoons of butter per filet
Sea salt and black pepper
In a small saute pan melt the butter over medium heat, add the onions and cook until the onions begin to caramelize. Add the remaining ingredients and cook for another 2-3 minutes. Remove from heat and set aside. The recipe says this is enough relish for 5 filets BUT * I didn't use the capers or the olives because Gary doesn't like them. I used an extra tomato.
For the salmon: The amount of butter that you use depends on how many filets you prepare. You will use 2 tablespoons of butter per filet.
Preheat the oven to 350F (176C). Generously season both sides of the filets with salt and pepper. Melt the butter in a small oven proof pan (I didn't do this, I just quickly transferred it to another dish before popping it in the oven). Anyway, melt the butter until it's hot enough so that when you put the filets in, skin side down, they sizzle. Let them cook for about 3 minutes then you're going to start basting the filets. I used a spoon and continuously basted non stop for 4 minutes. After this, pop your fish in the preheated oven for about 8 or 9 more minutes. I put all 3 filets in a baking dish and poured the butter from the pan over top of them.
The time in the oven depends on how thick your filets are. Mine were average. I used the tail end of the salmon so they were less fatty and a little thinner.
I served this with an Asparagus and Mushrooms recipe. I cooked the Asparagus first with the tomato relish, put both aside covered with foil to keep hot and then worked on the fish since the fish didn't have to cook for that long and needed constant attention for half the cooking time. :)
Enjoy! I know I sure as heck did. I actually DID LIKE IT! I'll prepare this again anytime.
Saturday, August 25, 2012
Friday, August 24, 2012
Julep has not let me down!
First thing I noticed was that the old Julep color came off my nails like butter. Sometimes, I really have to struggle, even soaking them in remover, just to get the damn polish off!
Julep comes off the nails really well!
OPI Chip Skip
Julep - Claire
Seche Vite top coat
Julep is still running the .01 first month. Use discount code
PENNY.
Thursday, August 23, 2012
Enchilada Chicken Stew
Move over "Taco Soup" which incidentally sounds disgusting to me, and even though people swear it tastes like heaven, I just can't bring myself to eat it.
This stew is going to knock your socks off. Again.... thanks Juli. I really need to dedicate a post just to her. She has single handedly made Paleo fun... and delicious AND funny, all at the same time.
I've been meaning to cook this (again) for days now, but me and remembering to START crock pot meals in the morning and not 8 hours later when I'm hungry don't get a long. That being said, I REMEMBERED today.. granted I only had 10 minutes to chop everything up and thaw chicken ... well I guess it's not really that much. Anyway.
You're going to need:
2lbs chicken breasts
1 yellow onion, chopped
1 green bell pepper, chopped
1 (4oz) can of chopped jalapenos
1 (4oz) can of chopped green chiles
2 tablespoons coconut oil
1 (14oz) can of diced tomatoes
1 (7 oz) can tomato sauce
3 garlic cloves, minced
1 tablespoon cumin
1 tablespoon chili powder
2 teaspoons dried oregano
salt and pepper, to taste
bundle of cilantro, to garnish *
avocado, to garnish *
Get the crockpot out. (Yes, stupid spell check, CROCKPOT is a word!)
Add in the chicken breasts
Throw everything else in on top.
Kinda mix it around with a spoon or something.
Put on low for 8-10 hours or if you're like me, and didn't remember at 6am, high for 6-8 hours. ;)
When it's all done, shred the chicken up with a fork or a chicken shredder. Yes, they make meat shredders. My girlfriend, Sandra, has one and I might steal it from her.
Eat it up after you've garnished. Which brings me to *... we both hate cilantro and I forgot an avocado so unless I get my lazy butt to Frys before dinner we AINT HAVIN' IT!
Cherry Jam Crepes
Once again, THANKS JULI!
I did take a picture but it looks like a big pile of goo because I didn't listen to her and wait til the crepes cooled to pile with whipped cream and again, I don't like to take other people's pictures.
You want to plan ahead for this recipe and put an open can of coconut milk in the fridge the night before. CAN not CARTON.
You also can't appreciate the full experience of cooking this without a big fat Walter laying in the middle of the kitchen floor the entire time so you trip and or step over him every time you turn around. Head to your nearest SPCA and grab the fattest cat you can find.
OK, here we go!
For the crepes
3 eggs, whisked
1/2 cup canned coconut milk
2 tablespoons coconut flour
1 tablespoon vanilla extract
1 teaspoon honey
For the cherry jam
1 cup cherries, PITS REMOVED
2 tablespoon honey
1 tablespoon coconut oil
For the whipped cream
1 cup of coconut whipped cream*
pinch of cinnamon
1/8 teaspoon vanilla extract
*For your whipped cream, get that can of coconut milk you left in the fridge last night and scoop out the coconut cream that has hardened in the top of your can of coconut milk. Leave the water behind. Then place coconut cream in a bowl, add cinnamon and vanilla, and whip! Toss it in the fridge to keep it cold while you cook!
Get a small saucepan and heat over medium. Add your coconut oil and cherries to the pan. Mix together to get the cherries all oily. Cook them down but keep stirring now and then so they don't burn or start to stick.
In the meantime, put a large skillet over medium heat. Add your crepes ingredients to a larger bowl and mix WELL to make sure there are no coconut flour lumps.
Once the skillet is hot, add some coconut oil to coat. Pour a small amount of the batter on the skillet. Just like little pancakes. I kept them little so that I could flip them easy enough. Crepes are super thin so they can break up pretty easily ... of course that didn't happen to me. <.<
Cook for a minute on each side. Do this until the batter is gone. Set them aside to cool a little, unlike me ok?
Hopefully you haven't forgotten about your cherries. Once they are soft, add your honey in there and mix everything all up.
Your crepes should be cool now. Start stacking!
I put whipped cream between every crepe and dumped a pile of my cherry jam on top. I then proceeded to stuff my face and now I'm sitting here, fat as a dumpling and full as a happy pig, typing this up for you.
I'm not sure Gary is going to like this recipe. It's a little coconutty but he likes lemon juice on his pancakes so maybe without all the toppings he'll like it. If he doesn't, I'm not going to cry because then I have more for ME!
The only thing that would make this recipe better is if someone came over and cooked and cleaned for me. Oh and a mimosa.
Wednesday, August 22, 2012
Creamy Chicken Chili
Well, I'm not sure why it's called that because it's not very creamy (or Gary wouldn't eat it) and there are more peppers than chili in it but I guess Chicken Peppers would sound dumb. ANYWAY, I have to credit Juli from paleomg.com for this glorious meal. I've made it twice now and I could have sworn that I had already posted it but nope, I hadn't. I can tell you though that even if you forget to add all the spices in, it's still delicious... but who does that right?
So let's start! You're going to need:
2 lbs chicken, diced into 1 inch cubes
1 red pepper, chopped
1 green pepper, chopped
1 yellow onion, chopped
1-2 jalapenos, seeded and minced
1 clove of garlic, minced *
1.5 cups chicken broth
1/2 cup coconut milk
1 (4 oz) can green chiles (diced makes life easier :D)
1 tablespoon olive oil
1 teaspoon salt
1 teaspoon garlic powder
1/2 teaspoon sage
1/2 teaspoon oregano
1/4 teaspoon cumin **
1/4 teaspoon white pepper
1/8 teaspoon ground red pepper
You're going to want to use a pot (instead of a sauce pan) for this. It's pretty much a soup. Put it over medium heat and add your olive oil and minced garlic.
Once you can start smelling the garlic, add your chicken in. Mix it around a few times to make sure it's cooked on all sides.
Once the chicken is about half way cooked through, add in all the peppers, jalapenos, onions and green chilis. Mix it up really good and let it cook for 3 minutes.
Add in your chicken broth, coconut milk and all of your spices... YEAH! Don't forget the spices! <.<
Stir it all up... cover and let simmer for about 7 minutes.
Enjoy!! (be careful, it's um... super hot and you might burn your mouth!)
* I used about 4, we love garlic
** I didn't use the cumin. We both hate cumin.
Tuesday, August 21, 2012
Birchbox & MyGlam and a new one! - August

So... let's go through the contents of the MyGlam August bag!
Demeter - roll on perfume oil - Dragon fruit scent and it actually smells light and fruity. Me like!
Eclos - Moisture therapy regenerative cream and cellular activator facial serum. Not sure if I'll try these. I really like my current skin care routine.
S.A.L.T.Y. Cosmetics - Glama-ZOID! Eyeshadow. It's kinda pinkish/violet and will make a good highlighter.
Circus by Andrea's Choice -This time I got the "Ringmaster" color and it's a VERY hot pink. I already have a favorite hot pink so this will probably be a gift for someone. Her colors are nice though and I didn't mind the brushes. Again, you still can't buy this until Fall.
They also included a MyGlam brand of a sparkly pink lipgloss.... you KNOW I love that!
And here is BirchBox. It wasn't bad.
It included:Schick 5 blade Hydro Silk razor - I'll probably never use it. I use the dollarshaveclub razors. Yeah, that's right, I steal Gary's razors!
Jouer - lip gloss. It came in a really hot pink. I prefer mine tinted and it might be tinted but it looks HOT PINK!
Juicy Couture - perfume sample. Viva la Juicy La Fleur. It actually smells really good. I'm not generally a fan of Juicy so yeah.
Oribe - shampoo and conditioner "for colored hair". I'll save this to send someone or toss in my guest bathroom. I'm kinda hooked on my own shampoo, plus samples are never enough for my freaken mass of hair!
whish - shaving cream. THIS looks interesting. It's organic, foam-free and full of lotion. I get really, dry, ashy legs so if this works then it's something I'll buy!

This was my first month for Beauty Box 5. They don't really say why "5" but whatever... these boxes are fun!
This was a trial month with me but they did a good job so I'll keep it up.
Let's go through it!
Blum Naturals - make up removal towelettes. I'll use the crap out of these. I am sure my esthetician won't be happy to hear this but sometimes I JUST DON'T WANT TO WASH MY FACE!
H20 Plus - restoring eye cream. I don't really have fine lines but I do have dark circles. I usually use BeautiControl's dark circles pen but I'll give this a try for sure! My dark circles are bad... and hereditary. <.<
Ferro Cosmetics - sheer crystal veil. I'll be honest. I probably won't use this. I don't wear much makeup or play around with it anymore. I have my set "face" and other than changing an eye shadow color I'm not going to mess around with new stuff. Put that in my "send to someone else" pile.
Ellis Faas - creamy, milky, glazed lips. FULL SIZED! Full sizes always make me happy. Anyway, I like the coffee color HOWEVER it's one of those tubes where you twist the color up and it comes through the brush... ya know? I know I'll like the color but I'm afraid if I don't like the consistency that I've just wasted a perfectly good product for someone else. I'll think about it. :)
Freeman - anti-stress mask. I just love masks. I do one every week and even talk Gary into it. I'm always on the hunt for a new one to try and they practically tossed 2 weeks worth in my lap! Plus, it's anti-stress... I'm always stressed :D
I don't think I can pick a favorite this week. It's a toss up between MyGlam and Beauty Box 5. I wasn't unhappy with any of them though. All in all, it's been a good samples month.
And here was another boring review by little ole' me. :)
Sunday, August 19, 2012
Paleo Fish Tacos

We used stone ground whole wheat tortillas which is NOT paleo but I didn't feel like dealing with lettuce so I used a cheat. The recipe calls for putting the fish taco mixture into romaine lettuce or cabbage. I've also used butter lettuce leaves.
You're going to need:
1lb fresh tilapia fillets;
1 tbsp Paleo cooking fat; (I used garlic olive oil)
1 medium onion, chopped;
4 cloves garlic, minced;
1 or 2 jalapeño pepper(s), finely chopped;
2 cups tomatoes, diced;
1/4 cup fresh cilantro, finely chopped;
3 tbsp lime juice;
Sea salt and freshly cracked black pepper to taste;
1 avocado, sliced; (For garnish)
I'm sure you can use any sort of fish that you'd like, but I used tilapia because of how mild tastes.
In a large skillet over a medium-high heat, combine the cooking fat with the garlic and onions. Cook for about 5 minutes, until the onions are soft and translucent in color.
Add the tilapia fillets to the skillet. Allow the fillets to cook for 3 to 4 minutes on one side prior to flipping. As the fish begins to cook through, use a fork to break it apart into flaky pieces.
Add the jalapeno pepper, tomatoes, cilantro and lime juice to the mix and then season with salt and pepper to taste. Cook for 5 minutes before removing from heat.
Serve the taco filling to your liking and garnish with fresh avocado slices.
Absolutely DELICIOUS!!!!!!!!!!
Julep : Trying a new brand!

I was going to wait a few days and post this after I'd given the polish enough time to see how it holds up but I know I'll forget so I'll just update it later.
Meet Rose. She's obviously not a rose color, but Julep names all of their colors (well, so far) girl's names and this one happens to be rose. It's actually a nice red.
If you know me at all, you know I'm addicted to monthly subscription boxes and most especially if they contain beauty products. When I heard about Julep, I knew this was something that I had to try. I did some googling for you and found some discount codes with really good "it works!" percentages.
color2012 - first month should be .01
penny - first month should be .01
welcomemv5 - first month should be $5 and free shipping!
Obviously, try the first 2 first. ;)
So, I'm going to quote directly from their website. Julep.com
Becoming a Julep Maven gives you exclusive access to COLOR. Each month we hand-pick trendsetting new nail colors, cult faves and cutting-edge beauty products that are just right for you. Commitment shy? No problem. YOU decide how often to receive your Julep Maven box, and you can cancel at any time.

I received my first box yesterday and this is what was in it! I'm not sure I'm fond of all of the colors and hopefully I can preview what they're sending each month BEFORE I have to skip or not. I wanted to try one though so I could review it and so I chose the red (Rose).
I love it! I love the brushes, I love how it goes on, and I love the color! I used the same OPI Chip Skip that I always use and finished it with the Seche Vite top coat, like always.
I'm still not sure how it's going to hold up and I'll update in a few days to let you know if it's chipping or wearing off too quickly. I'm hard on my hands so I'll know right away. <.<
If you're a nail polish addict like me, I highly suggest giving it a try for at least a month. With the discount codes it's a deal you can't turn down!
Blueberry Honey Coconut Cups
Mine look like garbage so I didn't take a picture and I didn't want to steal someone's picture so we're going without one this time.
THESE THINGS ARE SO FREAKING GOOD!!! If you like blueberries, coconut and honey you have to make these. BUT one of the ingredients you have to special order so plan in advance. :(
You're going to need:
1 cup Coconut Cream Concentrate*
1 cup blueberries
1 cup Gold Label Virgin Coconut Oil
1/3 cup raw honey
1/4 cup unsweetened shredded coconut
1/4 cup cashews, chopped (or other nut of choice)**
Now place a small saucepan over medium heat.
Add your blueberries and honey. Mix to help break down the blueberries.
Once your blueberries have pretty much turned to mush, add your coconut oil and coconut cream concentrate. They're not going to totally mush, but you'll be able to easily smoosh one against the side of the pan.
Mix thoroughly.
Remove from heat and add your shredded coconut and cashews.
Line your muffin tin with silicone liners or paper muffin liners, pour mixture into each cup to a height that you prefer, then place in freezer for about 30 minutes. Obviously freezers are different. Melia's might freeze them in 30 seconds... I checked mine after about 45.
*I haven't found this ANYWHERE except the website I linked to. They have it in stock now, but sometimes they're out. Spring for the big jar. You'll need it in a lot of Paleo desserts so you might as well spend the extra $8 or so.
**I left the nuts out and doubled the shredded coconut. Gary doesn't like nuts at all and I figured the best way to get him to try it is without. I've also been doing some research and I'm reading that nuts are not good for your complexion at all so I'm avoiding them when possible. I broke out like a mofo but I was also eating 1/2 bag of pistachios a day... whoops?
Tuesday, August 14, 2012
Paleo Pound Cake
Let me start this by saying it does taste quite a bit like coconut so if you don't like it, you're probably not going to like this. I, however, LOVE coconut so I got to eat it all because Gary doesn't. :D
You're going to need:
6 eggs
1 cup coconut milk
1/3 cup honey
2 tsp vanilla extract (use the real stuff people!)
1 tsp. orange extract *
1 cup coconut flour **
1/4 tsp baking SODA (not POWDER)
1/8 tsp cinnamon
1/8 tsp sea salt
coconut oil for the pan
Start by preheating your oven to 350F (176C).
Grease your loaf pan very thoroughly. The recipe also says lightly flour, which I didn't do and didn't have any problems but I use the Pampered Chef stoneware loaf pan so I really don't need to. Just use a little coconut flour and you'll be good.
IF you have a food processor I'd recommend using it for this recipe. I use it for all my Paleo breads because it just gets the batter nice and smooth and you don't have to worry about lumps of anything in your bread.
Beat the eggs until they are smooth. Add in the remaining liquid ingredients (coconut milk, honey, vanilla extract and orange extract) and mix it up.
Add in the dry ingredients (coconut flour, baking soda, cinnamon, sea salt) and mix until smooth. The recipe says to sift the coconut flour but I didn't and never do in my recipes and it turned out just fine.
Bake for 45 minutes to an hour. The recipe says 45 minutes but mine took close to an hour. Start checking it about 45 minutes in using the toothpick test.
Try and wait until it's cooled down a bit before diving in, believe it or not it comes out of the oven hot and even someone who's had a skin graft and should be skittish of hot things didn't wait and burnt her tongue.. idiot right?
* I didn't use orange extract. I don't have any on hand and didn't feel like going to the store.
** The recipe says "or flour of choice" but I wouldn't recommend swapping out flours unless you know the exact conversions. For example, if you're using almond flour you need to use LOTS LOTS LOTS more (I don't know the exact conversions and I'm not going to pretend that I do). Coconut flour to almond flour does not measure equally. Just stick with the coconut flour. It's lighter, fluffier and tastes amazing. :D
Thursday, August 9, 2012
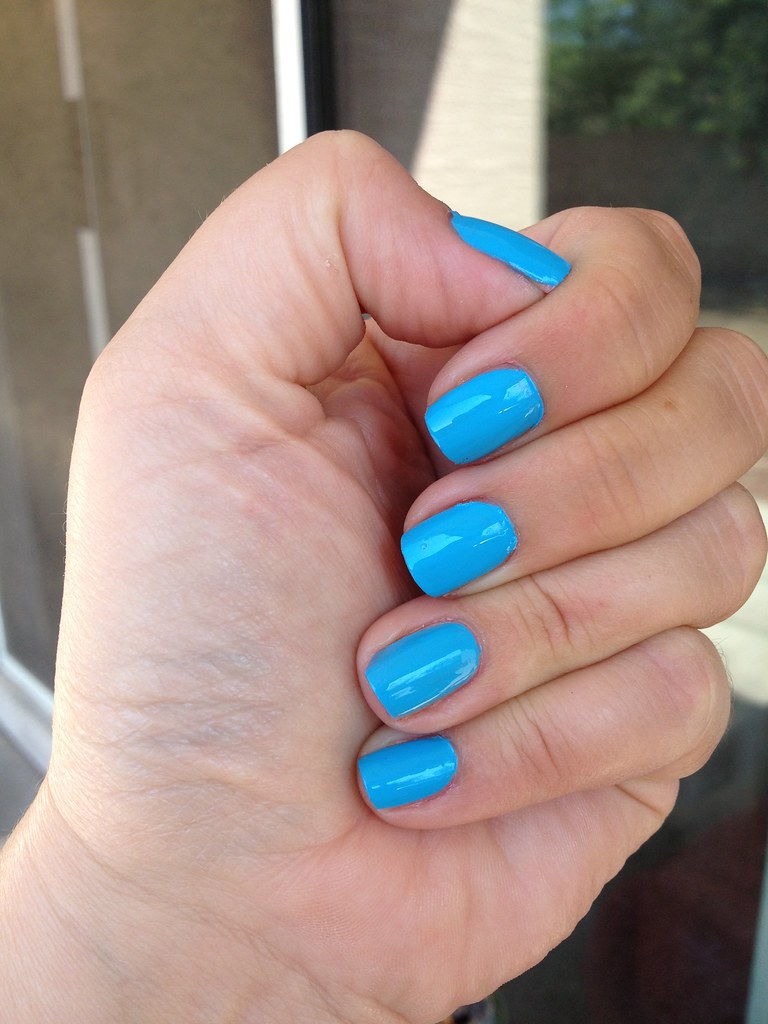
Yes, I painted them again!

Anyhow, I'm not usually a fan of blues/purples/greens and yellows on my nails but I'm trying to get out of my little box. The picture accurately captures the color. It's like a dark lavender... more blue than purple though.
O.P.I. Chip Skip
Essie - Smooth Sailing
Seche Vite top coat
The Essie comes from the Braziliant Collection and is available on Amazon and eBay. I'm not sure about the stores.
Wednesday, August 8, 2012
"Delicious" Beef Ribs
I've been really busy. I can't really tell you why, not that it's top secret or anything, I just can't figure out WHY I've been so busy. I think that it might be slowing down soon but in the meantime I'm just hanging in there and trying to cook good food.
I've been meaning to cook these ribs for like 5 days now. The meat has been in my fridge thawed and waiting for me but it's a crockpot recipe and I never remember to put stuff IN it until it's about 3 hours too late. Well, today I remembered!
Juli, at PaleOMG, calls these "Paleo Caribbean Jerk Crockpot Beef Ribs" but I left out a lot of the spices because I just don't like them so I'm going to just call them "Delicious Paleo Ribs". K? Good.
You're going to need:
2-3lbs beef back ribs
1 yellow onion, chopped
1/2 cup beef or chicken broth or even water. (I used beef)
1 tablespoon coriander
1 tablespoon ginger
1 tablespoon garlic powder
1 tablespoon onion powder
2 teaspoons salt and pepper
1 teaspoon thyme
1/2 teaspoon cinnamon
1/2 teaspoon nutmeg
1/2 teaspoon allspice
Ok guys, complicated instructions coming up!
First, put the ribs and the onions in the crockpot
Add your broth (or water)
Mix your spices together and put them in the crockpot, coating the ribs.
Crockpot it up for 6-8 hours on low!
While you're eating beef ribs please be very careful to pick out the bones, especially on these crockpot ones because the meat basically falls right off.
Anyway, that's the recipe as Juli posted it but I crossed out what I left out of my spice mixture.
Enjoy!!!
I've been meaning to cook these ribs for like 5 days now. The meat has been in my fridge thawed and waiting for me but it's a crockpot recipe and I never remember to put stuff IN it until it's about 3 hours too late. Well, today I remembered!
Juli, at PaleOMG, calls these "Paleo Caribbean Jerk Crockpot Beef Ribs" but I left out a lot of the spices because I just don't like them so I'm going to just call them "Delicious Paleo Ribs". K? Good.
You're going to need:
2-3lbs beef back ribs
1 yellow onion, chopped
1/2 cup beef or chicken broth or even water. (I used beef)
1 tablespoon coriander
1 tablespoon ginger
1 tablespoon garlic powder
1 tablespoon onion powder
2 teaspoons salt and pepper
1 teaspoon thyme
Ok guys, complicated instructions coming up!
First, put the ribs and the onions in the crockpot
Add your broth (or water)
Mix your spices together and put them in the crockpot, coating the ribs.
Crockpot it up for 6-8 hours on low!
While you're eating beef ribs please be very careful to pick out the bones, especially on these crockpot ones because the meat basically falls right off.
Anyway, that's the recipe as Juli posted it but I crossed out what I left out of my spice mixture.
Enjoy!!!
Sunday, August 5, 2012
Garlic Chicken Pasta
A few days ago I was wandering Ross with my girlfriend, Teri. While she was trying on some clothes I was in the kitchen aisle. Well, I found a mandolin and I've been wanting to get one for a while. This one also had a grating setting and my favorite of all, a julienne setting! All for under $10! I love Ross so hard. As soon as I saw it, I knew which recipe I was going to try next. I had seen this a few weeks ago but the thought of having to hand julienne veggies made me cringe.
Last night I was thinking of just serving leftovers but I wasn't in the mood for anything we had leftover and the more I thought about it, the hungrier I became. So, I pulled up my newest favorite website - paleOMG and got to cooking.
After dinner I promptly went to Juli's blog and asked her to marry me.
I was actually setting myself up for failure with this recipe. It contains 4 things that Gary really doesn't care for at all: zucchini, squash, tomato sauce and coconut milk. He LOVED IT! So here we go!
You're going to need:
2 lbs chicken, diced
2 zucchini, julienned
2 yellow squash, julienned
1 onion (small to medium), diced
3 tablespoons olive oil
1 tablespoon minced garlic
1/4 cup tomato paste
1/2 cup coconut milk
1 1/2 teaspoons salt
1 teaspoon balsamic vinegar
1 teaspoon hot sauce *
1/4 teaspoon crushed red pepper
1/4 teaspoon Italian seasoning
1 large can diced tomatoes
3 whole heads roasted garlic, cloves removed from peels
salt and pepper, to taste
I would highly suggest doing the first step a while before you're going to start cooking.
Start by heating your oven up to 400F (204C). You're going to roast garlic. Peel away the outer layers of the bulbs, just the outer layers. Cut off the top of the cloves so that you can see the individual cloves of garlic. Now, I use a muffin pan to set each bulb in to keep them from tipping over but you can use a regular pan. Drizzle about 2 teaspoons of olive oil over each head. Make sure that the garlic head is coated in oil. Cover them up with aluminum foil and bake for 30 to 35 minutes. The reason I suggest doing this before you're ready to use them is because they come out of the oven HOT obviously and you need to gently squeeze each head to get the cloves to pop out and when they're HOT it's kinda hard. Maybe I'm sensitive since the skin graft but anyway....
Julienne your zucchini and yellow squash.
Add olive oil to a large saucepan and saute the onion over medium-high heat until they're soft.
Then you're going to add in the tomato paste, diced tomatoes, balsamic vinegar, hot sauce, crushed red pepper, Italian seasonings, salt and pepper. Cook it for about a minute then add in the coconut milk. Don't worry, it doesn't make it very creamy at all, just enough to make it perfect.
Take your diced chicken and put it directly into the sauce. Turn the heat down to low and cook it for about 15 minutes. Stir it occasionally.
After 15 minutes, add the garlic cloves you've roasted and the julienned zucchini and squash and stir it up. You didn't miss a step, you're not mincing or dicing the roasted cloves up, just add them directly into the sauce. Cook for another 5 to 8 minutes to let the squash/zucchini soften up then SERVE!
You are not going to be disappointed. This dish is absolutely fantabulous!
* There are 100s of hot sauces out there. We used Texas Pete. It gave it some heat without changing the flavor.
Saturday, August 4, 2012
Whimseybox - July

This is the 2nd month I've received from them and the 2nd time they've sent it so late I received it in the following month. After last month's craptacular box, I said I'd give it another month and see what happened. Let me refresh your memory: This company sends you a box chock full of "new and best-selling craft product samples". The box is supposed to inspire you and your crafting ideas.
I was pretty excited when it finally showed up today. I went to rip the packaging open and well, it wasn't sealed but after inspecting the box, it did arrive in good condition. Packaging, that's about all they're good for. Although, as I inspect my box I see there is something missing off of the outside but anyway, I don't care, I want to get to the goodies!
If you can't tell what it is by the picture, I'll explain .... 2 colors of floss, about 6 inches of chunky fake gold chain and then about 15 inches of "ball chain". Really? I paid $25 a month for this? I could get this garbage at Hobby Lobby for under $5. And then, if that's not enough, they put directions on how to make a "chunky link ball chain friendship bracelet" in the box. This is supposed to be an inspiring box, not a box of garbage with instructions on how to make more garbage. I'm so freaking disappointed. I'll stick to my beauty sample boxes instead. This girl is cancelling her subscription.
That being said, if anyone wants 2 boxes of crafting crap just drop me an email, I'll send it your way and I'll even cover shipping. <.<
Essie strike again!

O.P.I. Chip Skip
Essie Super Bossa Nova
Seche Vite Top Coat
The Essie color came from the Summer 2011 collection so you can't buy it from Essie anymore (probably not in stores either). I got mine from Amazon or eBay... I forget which one but I just searched and they both have it!
Paleo (gluten free) Bread!

I tried one 2 weeks ago, and while it was good, it was very, very dense/heavy. I had to drown it in honey and one tiny slice had me full for hours. It was HEAVY!
I was doing some hunting a last week for a new one to try and I came across this one and I feel really bad but I don't remember where I found it so I can't give credit. I also made a few changes for lack of ingredients.
You're going to need:
1 3/4 cups almond flour
2 Tbs coconut flour
1/4 tsp sea salt
1 1/2 tsp baking SODA (not POWDER)
5 eggs
1/4 cup coconut oil
1 Tbs honey
1 Tbs apple cider vinegar
The best way to do this is with a food processor. The bread I made last week I hand mixed and it was kinda lumpy. The food processor got this as smooth as pancake batter and I think that made a difference.
Put the almond flour, coconut flour, salt and baking soda in the processor. Pulse it a few times to mix it all up.
Put in the eggs, oil, honey and vinegar and pulse it a few times to get it all nice and smooth.
Pour the batter into a loaf pan (about 7.5 x 3.5). You can grease it if you'd like. I use my Pampered Chef stoneware so I don't need to.
Bake at 350F (176C) for 30 minutes. A knife should come out clean if you stick it into the bread.
I waited until the morning after to post this so I could know if it tastes as good the day after and it DOES. It doesn't harden up at all. I wouldn't hold on to it more than 2 days, but as tasty as it is, it probably won't last a whole day. ;)
Subscribe to:
Posts (Atom)